[CCP14 Home: (Frames | No Frames)]
CCP14 Mirrors: [UK] | [CA] | [US] | [AU]

(This Webpage Page in No Frames Mode)

CCP14

Tutorials and Examples

Powder for Windows (Convert of old) by Nita Dragoe

Merging and normalising multiple powder XRD patterns using Nita Dragoe's Powder for Windows (tutorial by Nita Dragoe and Lachlan Cranswick)

The CCP14 Homepage is at http://www.ccp14.ac.uk

[CCP14 Tutorials page] | [Nita Dragoe's Powder for Windows] | [GSAS Tutorials]

With the latest Powder4 for Windows by Nita Dragoe will allow you to merge and normalise up to 10 patterns into a single file.


Download the zipped raw data files for merging, UDF and XY format


With the latest Powder4 for Windows by Nita Dragoe will allow you to merge and normalise up to 10 files into a single file (calculating appropriate ESDs for each count). For this you need to give each pattern a "monitor" value (counting time is probably the best way for most scans). This is done via the Powder v4 interface as shown below.

Following are a few tips on how to use the latest Powder4 (i.e. version 0.3b) if you want to merge powder XRD files. WARNING: this is a dangerous operation, do not massage your data; make sure you know what you are doing.

First run Powder for Windows (make sure you have the latest versions)

A few instructions are listed on this panel ; read this from time to time, it contains some useful hints on what's going on with the program.
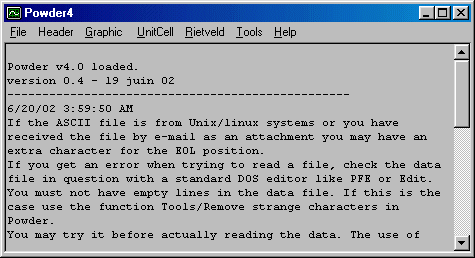
Powder starting screen


We are going to merge 10 files. Normally you have to conver the files into column XY, or XY_ESD format. In the above example data, the UDF files have been converted into XY format using Convert.

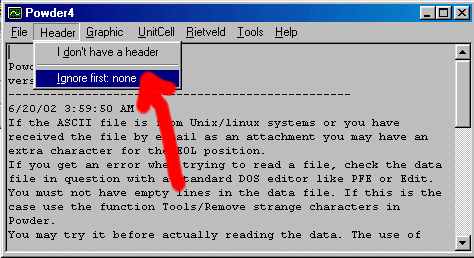
All these files have the first line as header, so we'll have to "tell" the program how to handle this. First, we click on Header/I don't have a header (this is optionally here but in many cases it's important to instruct the software that there is no header to look for). Then we click on Header/Ignore menu, just like in the following picture:

Now this is important : you have to instruct the program to ignore the first line otherwise you'll get a mess. Alternatively you can delete all the comments from the file but it's better to keep the original header in place (do not mix up the files!!!).

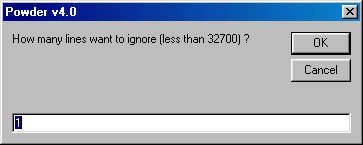
Ignoring the header lines


A small window will appear in which you insert (an integer) how many lines will be ignored.

Cancel or 0 have the same effect.

After that you can see listed in the menu Header/Ignore how many lines are going to be ignored. By line, this means everything up to an EOL character.

Ignoring the header lines


All the Merging files have to be in the same format (the same number of comments, the same step, the same wavelength). It is not necessary to have overlapping ranges, you may as well just add to files say one having data from 20 to 90 the other from 90 to 120.

There are two possibilities for merging files: either XY ascii files or XYZ ascii files. For the first case the ESD will be computed internally; then everything is the same.

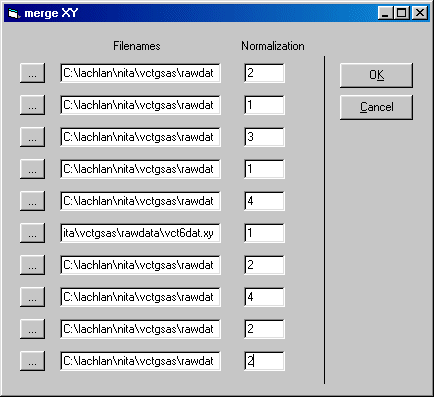
In the following we will merge the three files : we choose File/Merge XY files (File, Merge XY Files) and add the files via the dialog box. Give the appropriate "normalization / monitor" value to the right of the file name. In this case, they are all 1 (equally weighted or 1 second per step in the counting time)

Adding files


Now click OK

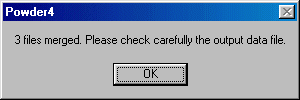
You will be prompted to output to a filename (enter this and the directory you wish the file to be place in); then you should get the following style of "OK" message:

Files merged

This creates a file in the following style of format (2-theta, counts, ESD, ready to be converted into other formats such as GSAS)

 -> merged 15/07/02 21:16:56
    17.00 ,         9.00 ,         1.50
    17.02 ,         6.50 ,      1.27475
    17.04 ,         6.00 ,      1.22474
    17.06 ,         4.50 ,      1.06066
    17.08 ,         5.50 ,       1.1726
    17.10 ,         5.00 ,      1.11803
    17.12 ,         9.50 ,       1.5411
    17.14 ,         4.00 ,         1.00
    17.16 ,         6.50 ,      1.27475
    17.18 ,         7.00 ,      1.32288
    17.20 ,         7.50 ,      1.36931
    17.22 ,         6.00 ,      1.22474
    17.24 ,         5.00 ,      1.11803
    17.26 ,         5.00 ,      1.11803
    17.28 ,         7.00 ,      1.32288
    17.30 ,         6.50 ,      1.27475
    17.32 ,         7.00 ,      1.32288
    17.34 ,         7.50 ,      1.36931


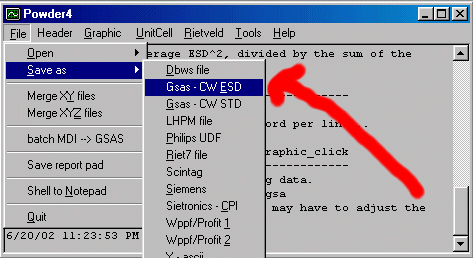
The Merged data is still in memory so you can still save this into other formats, such as XYZ, ASCII or GSAS ESD format. For creating a GSAS ESD file, just select File, Save As, Gsas - CW ESD

Creating a GSAS ESD file

Following is the top of the newly created GSAS file

Sample Title                                                                                
BANK 1 6145 1229 CONST 1700 2 0 0 ESD                                           
     9.0     1.5     6.5     1.3     6.0     1.2     4.5     1.1     5.5     1.2
     5.0     1.1     9.5     1.5     4.0     1.0     6.5     1.3     7.0     1.3
     7.5     1.4     6.0     1.2     5.0     1.1     5.0     1.1     7.0     1.3
     6.5     1.3     7.0     1.3     7.5     1.4    10.0     1.6     5.0     1.1
     7.0     1.3     3.5     0.9     8.0     1.4     7.5     1.4     8.0     1.4
     6.0     1.2    10.5     1.6     7.0     1.3     6.5     1.3     6.0     1.2
     5.0     1.1     6.5     1.3     7.0     1.3     6.5     1.3     8.5     1.5
    11.0     1.7     9.0     1.5     8.5     1.5     6.5     1.3    10.0     1.6
    10.5     1.6     8.5     1.5    10.5     1.6    11.0     1.7    13.0     1.8
     7.5     1.4     8.0     1.4    10.5     1.6     5.5     1.2     7.5     1.4
     7.5     1.4    11.0     1.7     8.5     1.5    13.0     1.8    11.0     1.7
    10.0     1.6    20.5     2.3    18.5     2.2    14.0     1.9    14.0     1.9
    17.0     2.1    23.0     2.4    24.5     2.5    22.5     2.4    26.5     2.6
    34.0     2.9    55.0     3.7    62.0     3.9    77.5     4.4   120.0     5.5
   127.5     5.6   128.5     5.7   107.0     5.2    67.5     4.1    43.0     3.3
    19.5     2.2    16.5     2.0    13.0     1.8    11.0     1.7    13.0     1.8


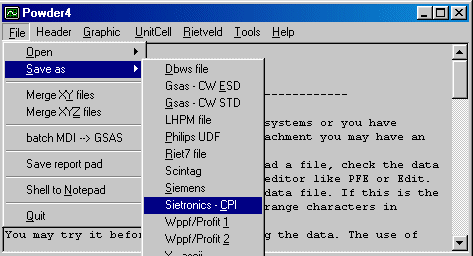
If you are in the mood to create other files (e.g., CPI, just select File, Save As, Sietronics - CPI. However, note that the ESDs will not be included in this format.

Creating a CPI file

Following is the top of the newly created CPI file

SIETRONICS XRD SCAN
17
139.9
0.02
Cu
1.54056
16-1-1998
1
SampleIdent
SCANDATA
9
6.5
6
4.5
5.5
5
9.5
4
6.5
7
7.5
6
5
5
7
6.5
7
7.5
10
5
7
3.5
8


[CCP14 Tutorials page] | [Nita Dragoe's Powder for Windows] | [GSAS Tutorials]

[CCP14 Home: (Frames | No Frames)]
CCP14 Mirrors: [UK] | [CA] | [US] | [AU]

(This Webpage Page in No Frames Mode)

If you have any queries or comments, please feel free to contact the CCP14