Contrast
Starting from
the upper-left sub window, its image contrast can be adjusted quantitatively
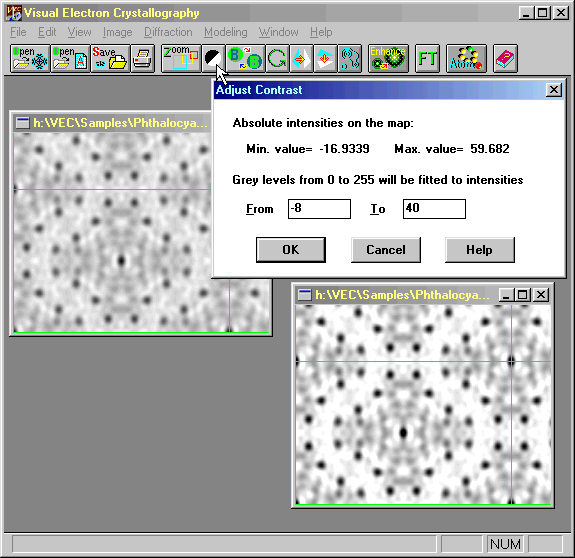
as follows. Click the button  . A dialog box will appear, in which values of minimum and maximum absolute
intensities of the image are displayed. By default these two values are
fitted repectively to the minimum (0) and maximum (255) gray levels on
the screen. By narrowing the intensity range the image will turn sharper.
Oppositely broadening the intensity range will flatten the image contrast.
In the present example, when the minimum intensity is set (in the left
data box) to -8 instead of -16.9 and the maximum intensity is set (in the
right data box) to 40 instead of 59.7, the image contrast will be changed
to that in the lower right window. Actually the result does not appear in a new
sub-window but just replace the image in the original sub-window. If you wish to keep the
result, You would save it manually before attempting to close the window.

The following
is an example, though nothing crystallographic, demonstrating the ability
of contrast adjustment provided by VEC.

Original image of the printed word 'SCIENCE' produced by a scanner in 256
grayscale.

Black & white image converted from the original image.

Black & white image converted from the VEC processed result of the original
image. The procedure of processing is shown below.
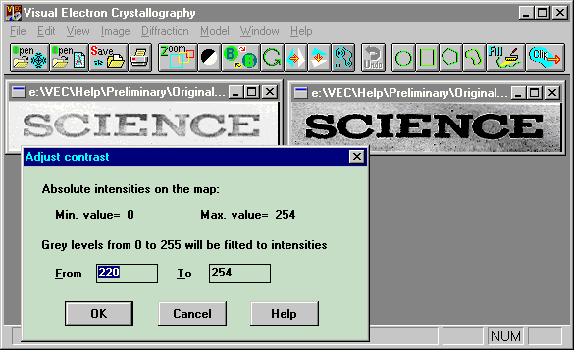
Step 1:
Starting from
the original image on top-left, click the button  . Put '220' in the left data box of the dialog box and click 'OK'. The
result will be that on top right.

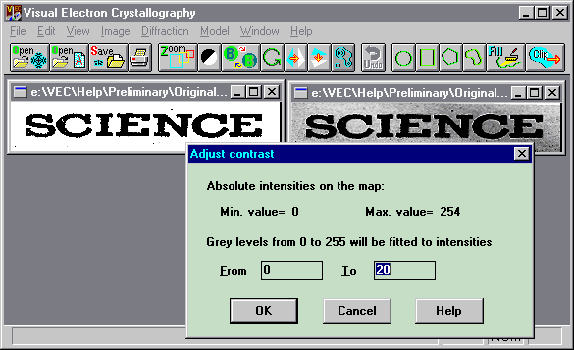
Step 2:
Starting from
the image on top-right, click the button  . Put '20' in the right data box of the dialog box and click 'OK'. The
result will be that on top-left.

 . A dialog box will appear, in which values of minimum and maximum absolute
intensities of the image are displayed. By default these two values are
fitted repectively to the minimum (0) and maximum (255) gray levels on
the screen. By narrowing the intensity range the image will turn sharper.
Oppositely broadening the intensity range will flatten the image contrast.
In the present example, when the minimum intensity is set (in the left
data box) to -8 instead of -16.9 and the maximum intensity is set (in the
right data box) to 40 instead of 59.7, the image contrast will be changed
to that in the lower right window. Actually the result does not appear in a new
sub-window but just replace the image in the original sub-window. If you wish to keep the
result, You would save it manually before attempting to close the window.


 . Put '220' in the left data box of the dialog box and click 'OK'. The
result will be that on top right.

